
Business Details
Business details includes information about your business as well as specific settings that impact what you see in the WizeHub.
Go to System Preferences > Business Details.
General Information
- Business name* - The business name is entered during the initial setup of your firm's WizeHub.
- ABN or business identifier* - This is the government business registration number in your country.
- Country* - The country determines the currency displayed in financial fields throughout the WizeHub. Any fields with a phone number will also show your country code by default.
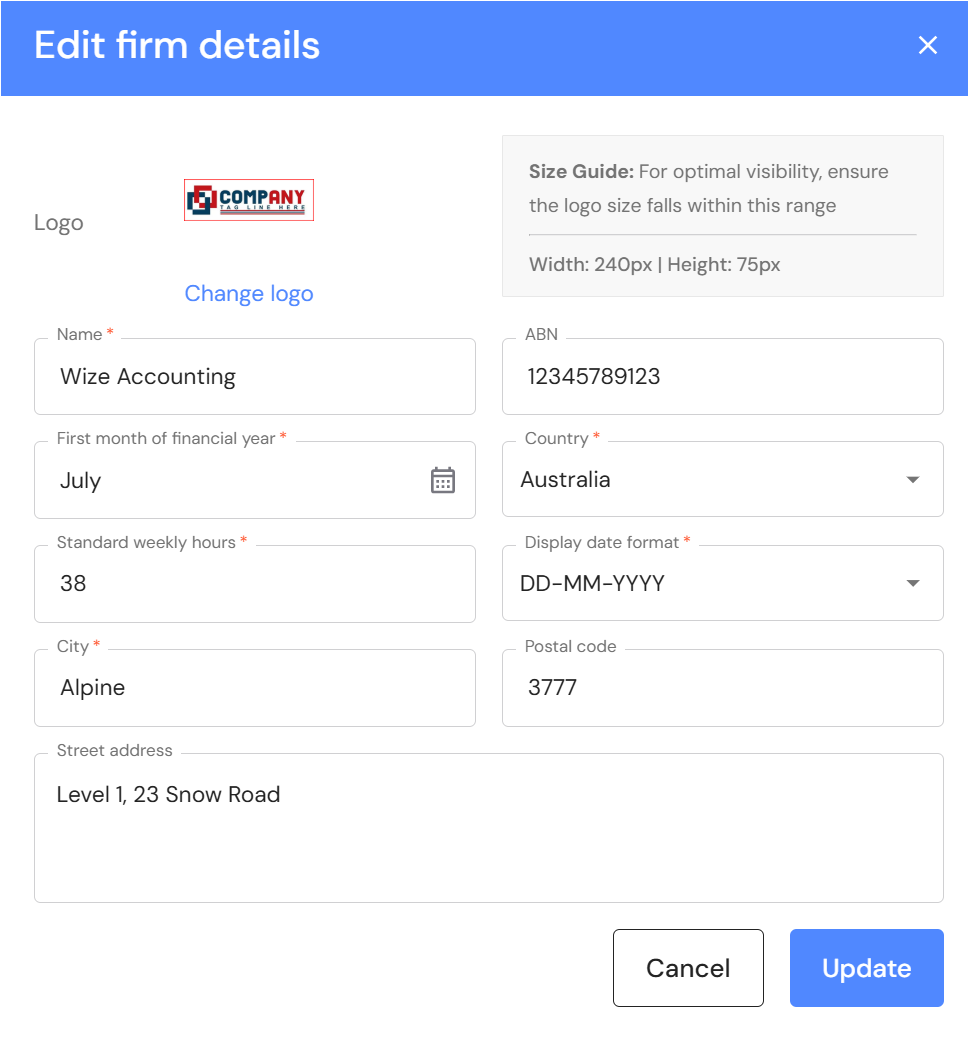
- Street address* - Click on 'Edit details' to add your business address.
- City* - Your city was entered during sign up.
- Postal code* - Click on 'Edit details' to add your postal/zip code.
- First month of financial year* - This is also selected during sign up. This field determines your financial year period and the column headings where financial data is entered or displayed in the WizeHub. IMPORTANT: If, for any reason, you need to change the month after you enter data in the WizeHub, it may impact how your data is displayed. We recommend taking a screenshot of financial year data before you update this field in case you have to re-enter and re-align the values.
- Currency - This is the currency displayed in the WizeHub, determined by the country.
- Display date format* - You can set your preferred date format throughout the WizeHub.
- Standard weekly working hours* - Enter the standard weekly hours for a full time employee in your business. This field is used to calculate the full time equivalent (FTE) for each team. It applies to the distribution of overheads by headcount in the EBITDA plan. To ensure accurate calculations, this must be set before you setup employee profiles in People. If you have already added your employees, you can simply click on edit and update each employee and this will ensure the calculation is applied accurately if you choose to the overheads by headcount method in the future.
*These fields can be updated by clicking on 'Edit details' in the top right corner.
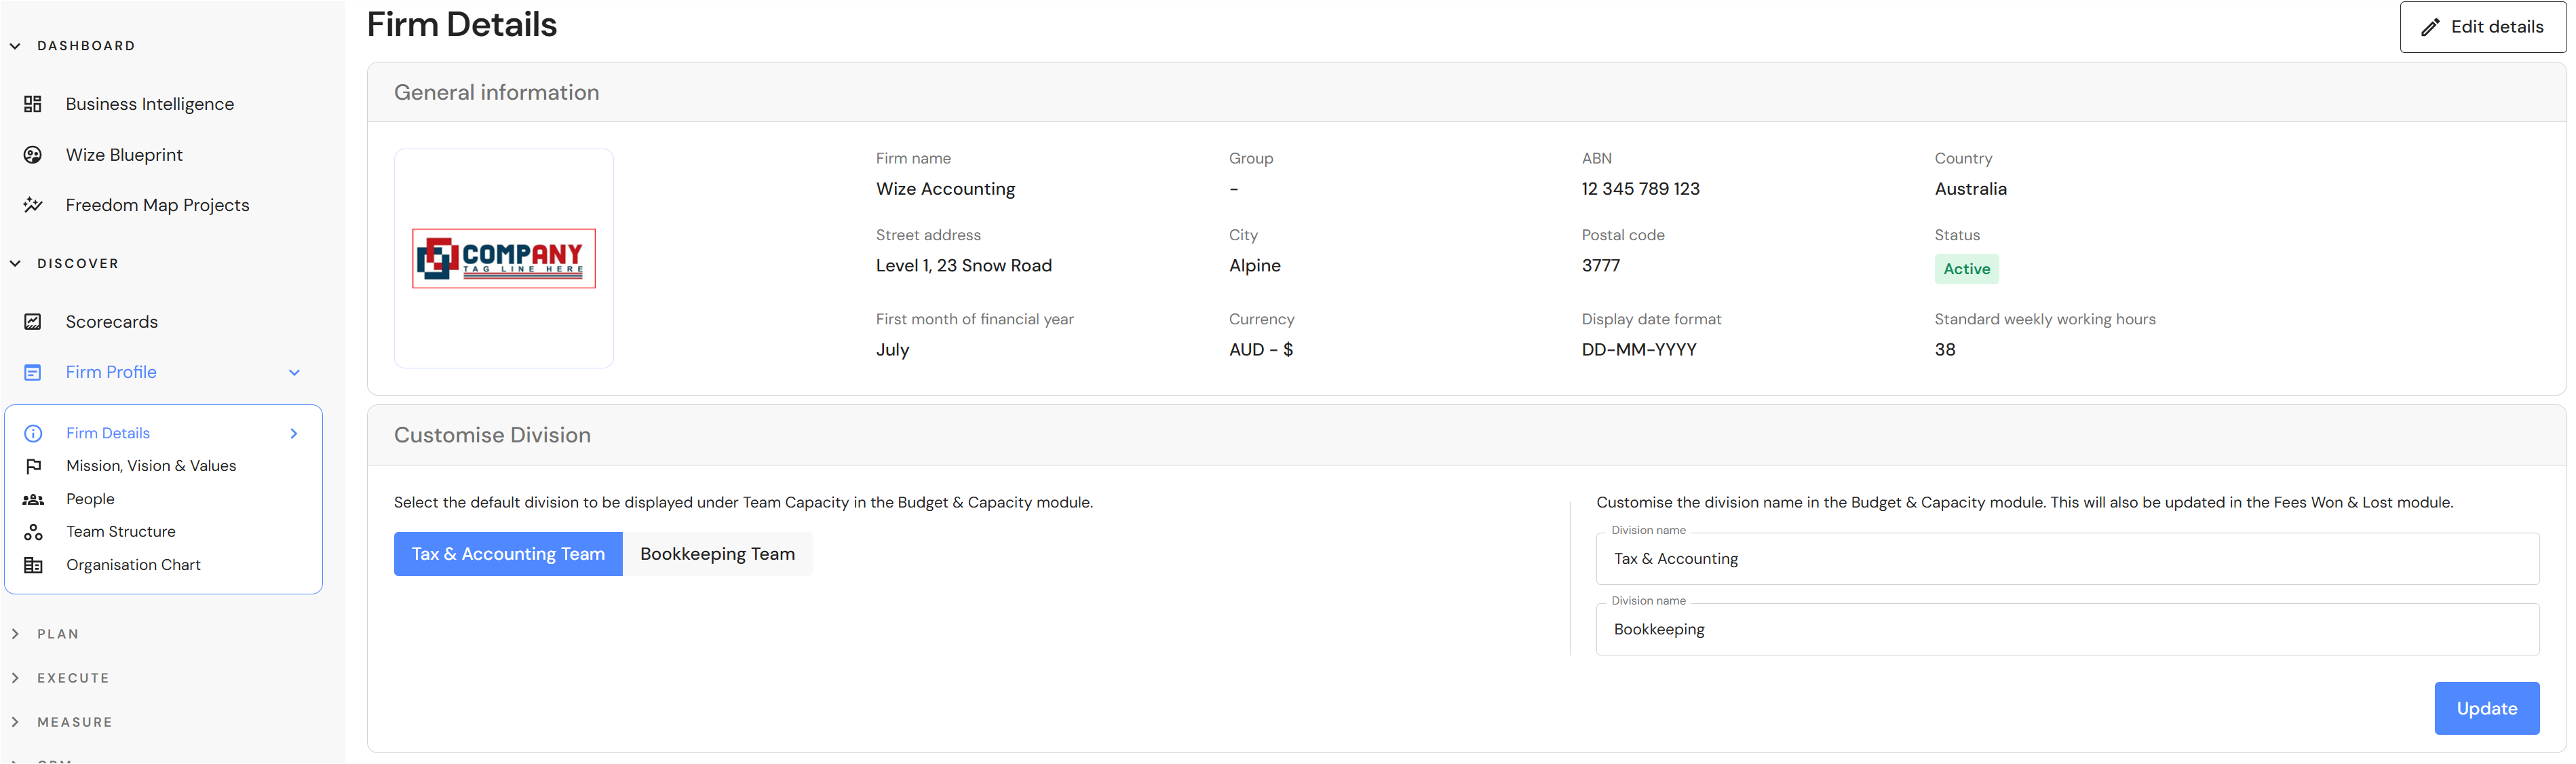
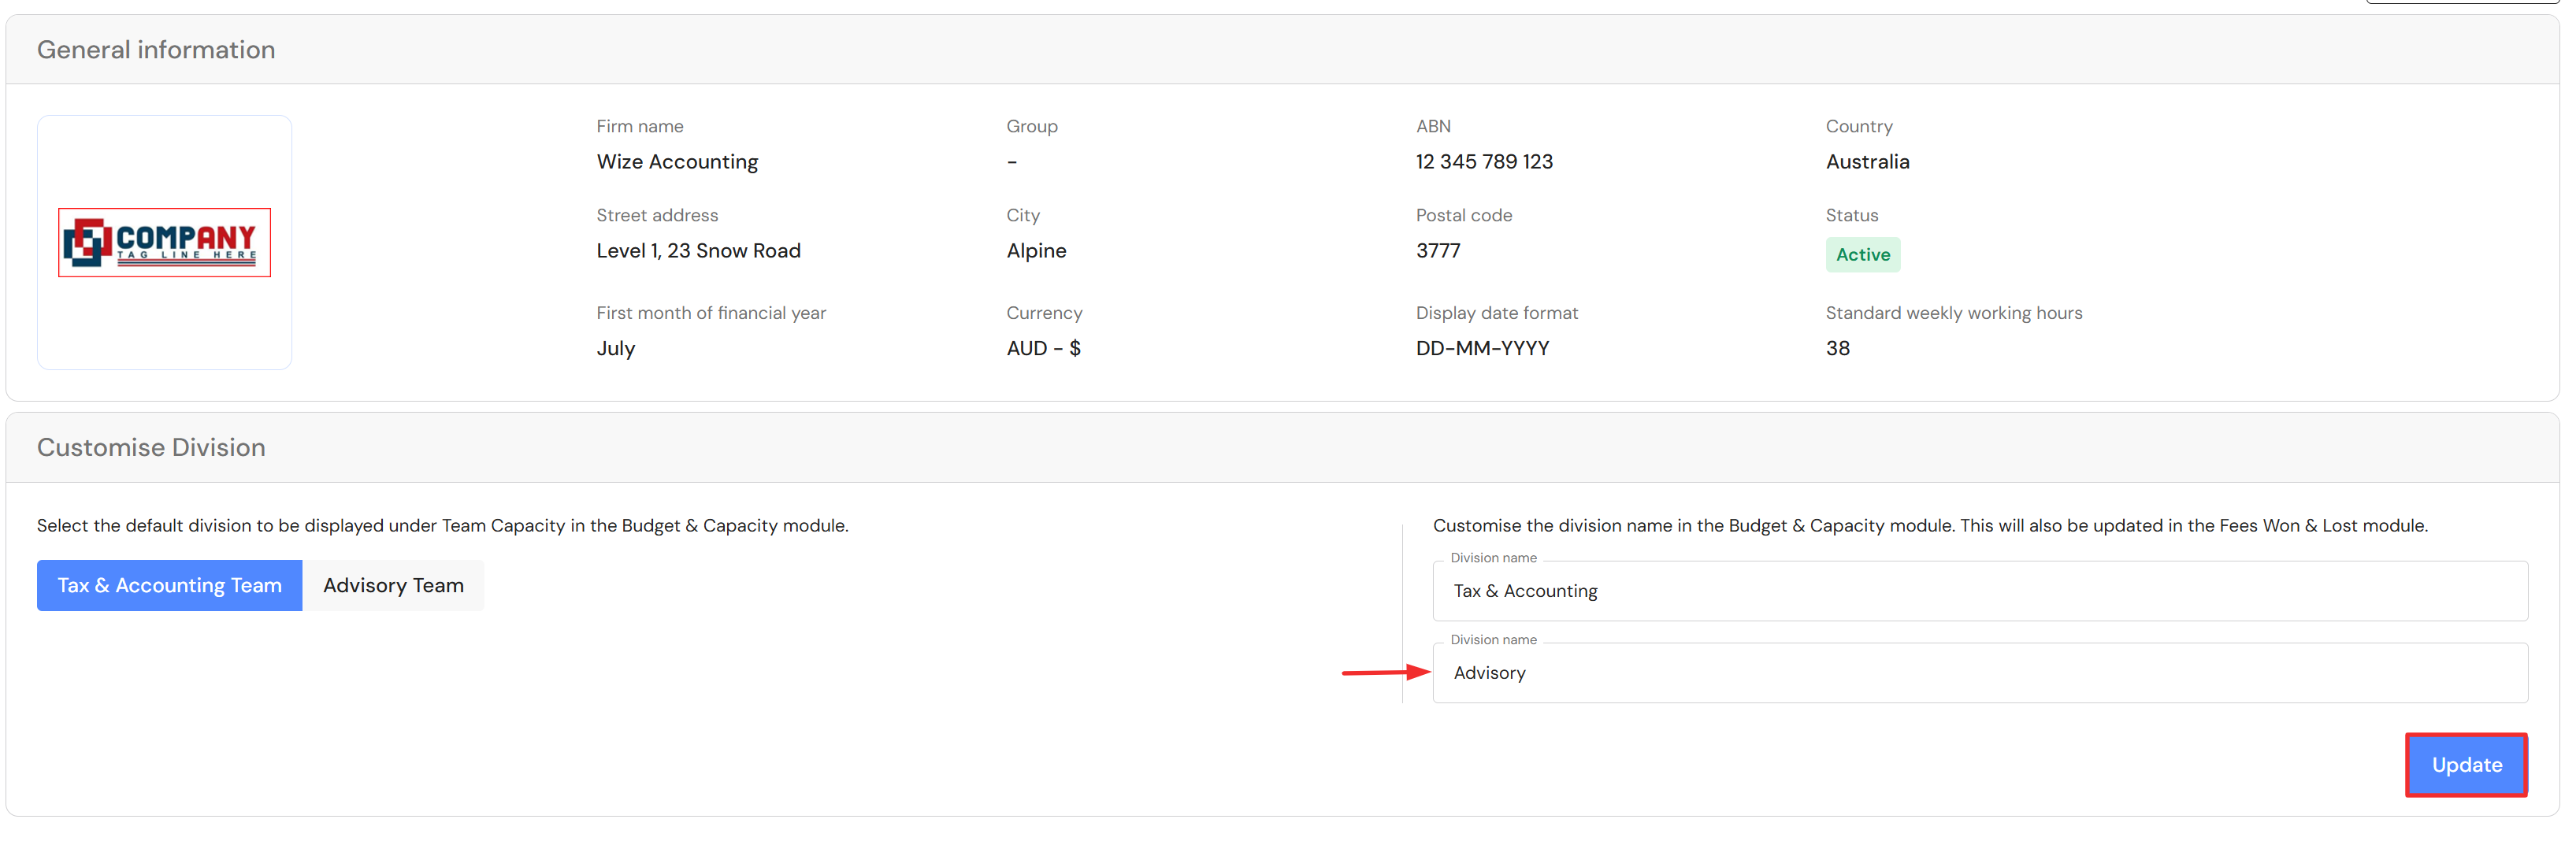
Customise Division
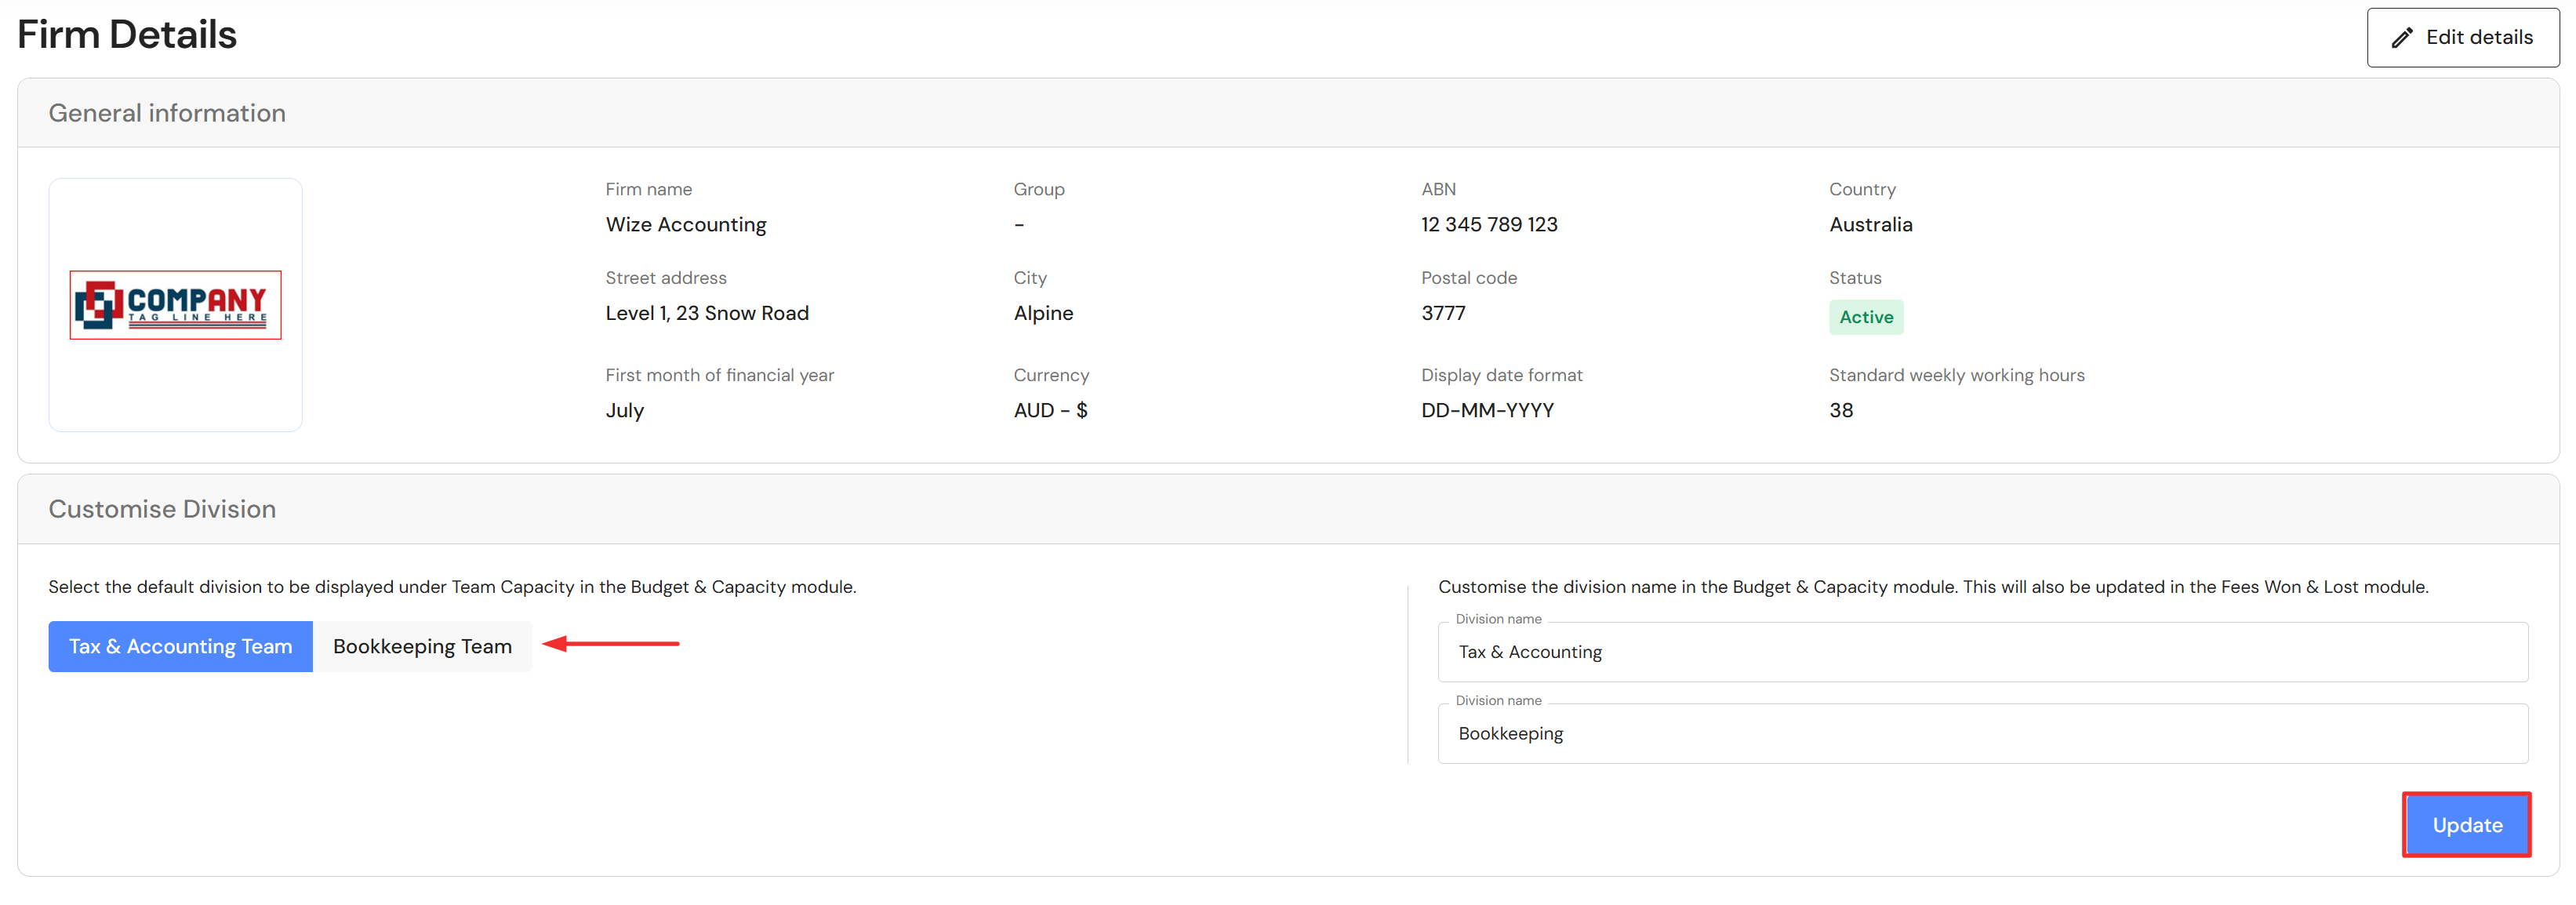
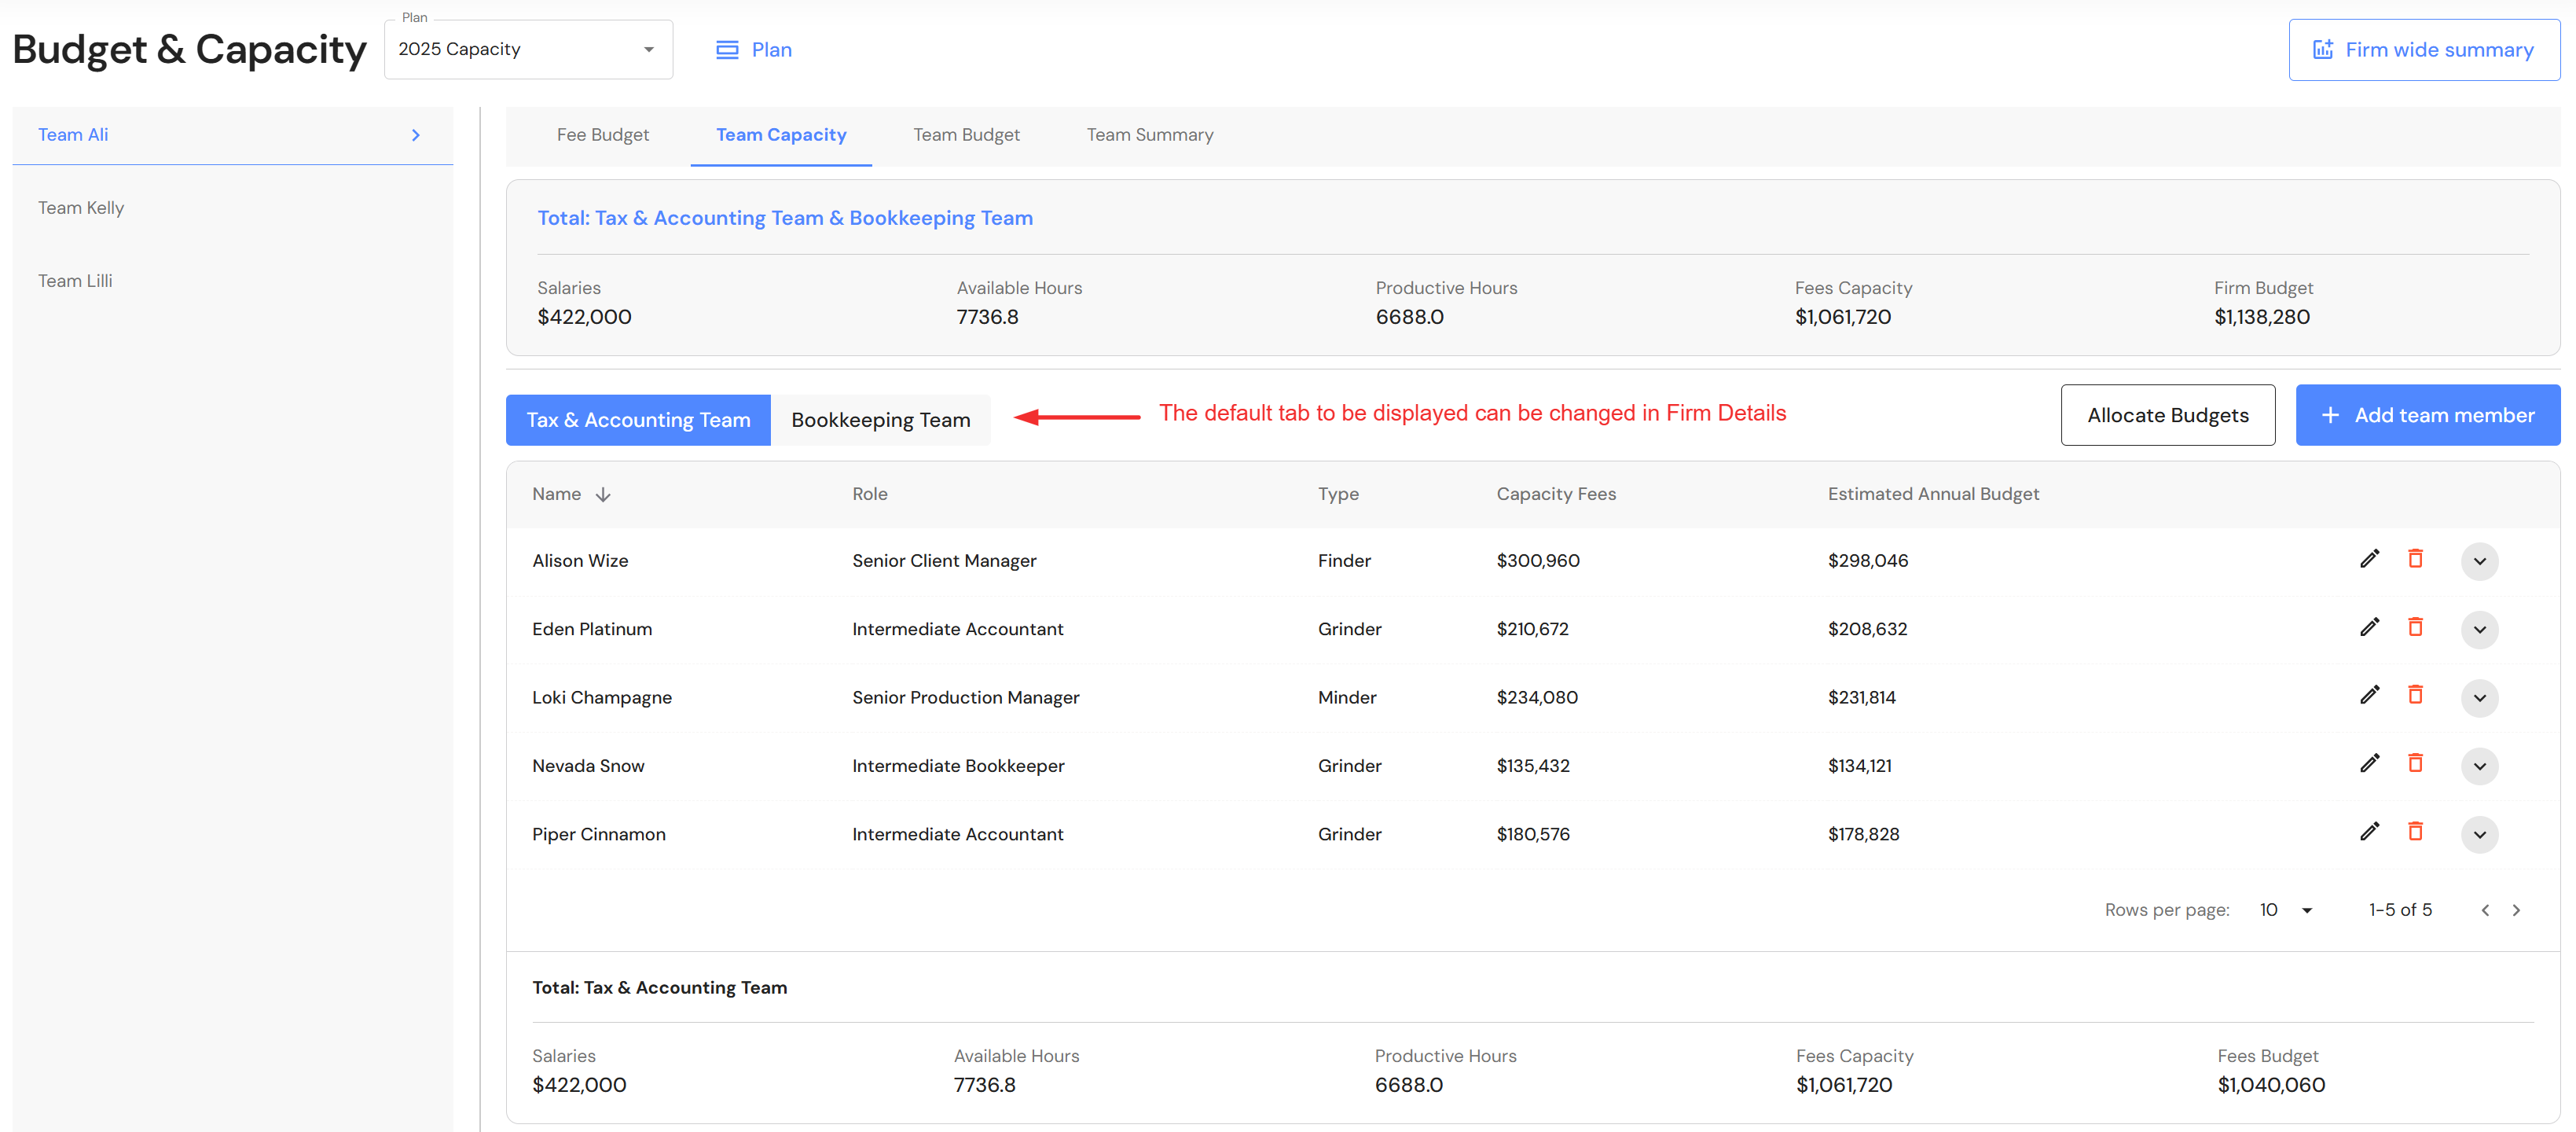
The Budget & Capacity plan shows a separate tab for each division under the Team Capacity tab. You can choose which tab will appear by default by click on the tab heading and selecting update.
You can see the division tabs in the Budget & Capacity plan here.
You can also customise the name of your divisions. The change will take effect in the Budget & Capacity plan and Revenue Won & Lost plan.
To customise the names, simply rename the division(s) and click on update.
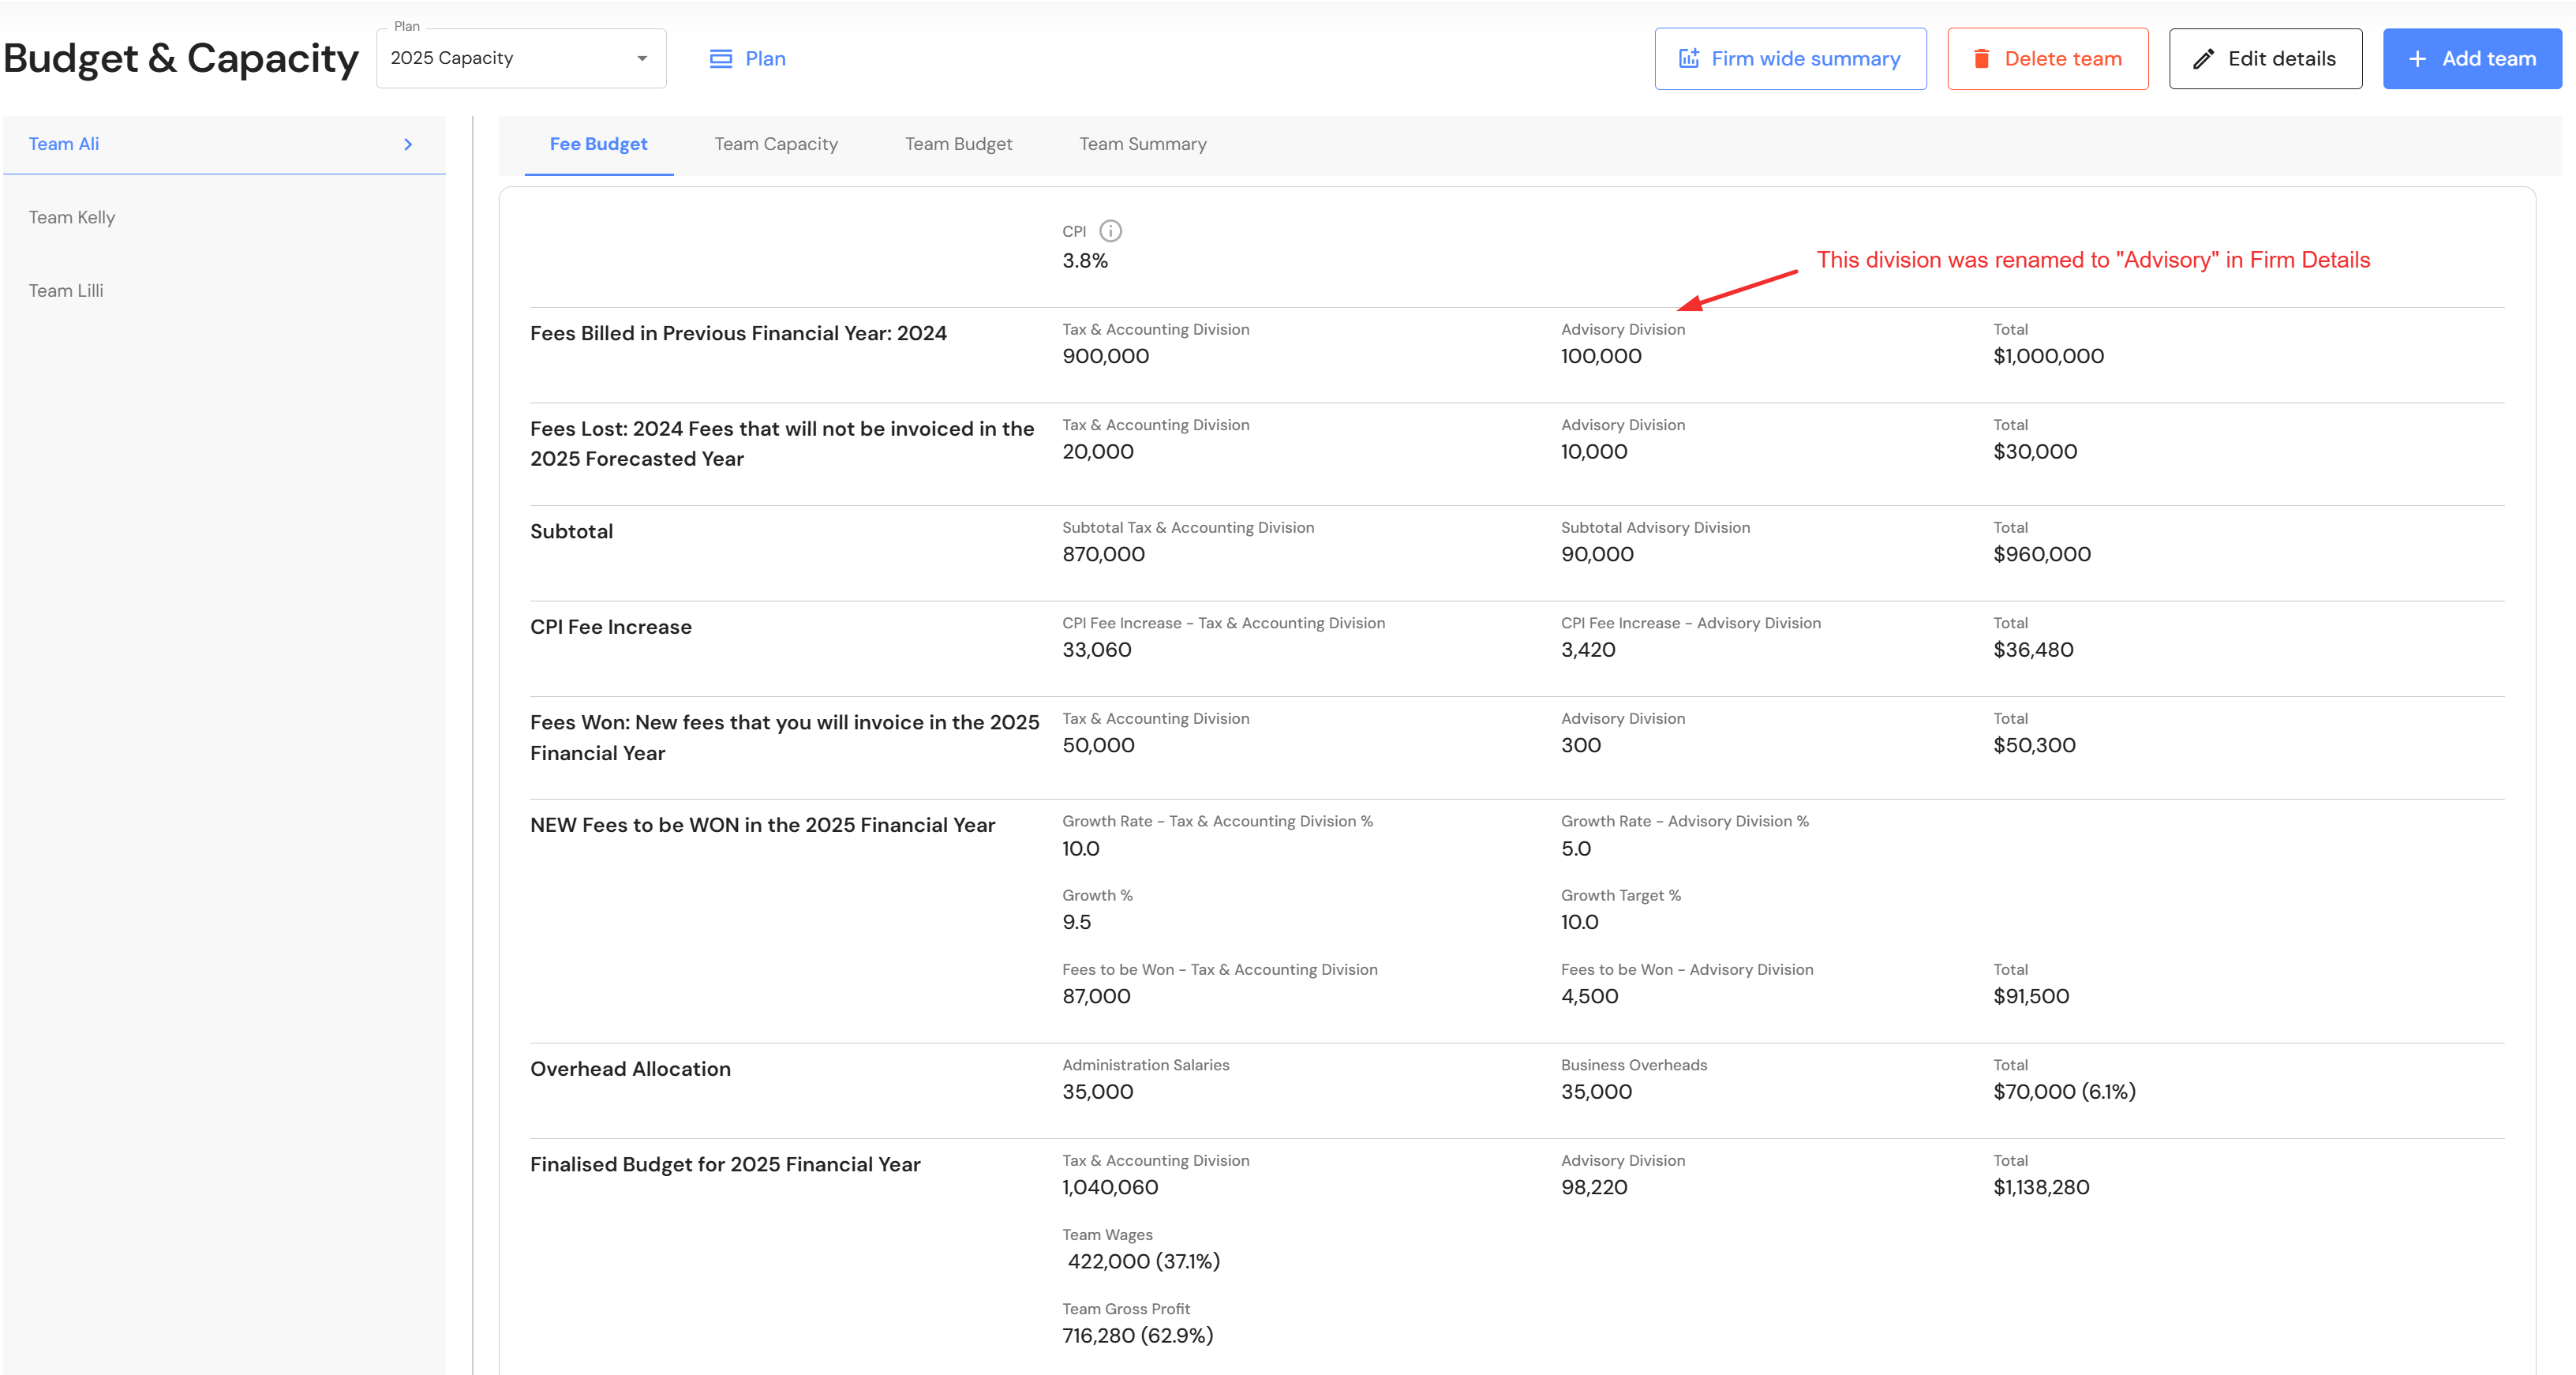
See the impact of renaming the division in the Budget & Capacity Plan. The change also flows through to the Team Capacity, Team Budget and Team Summary tab (not pictured here).
See the impact of renaming the division in the Revenue Won & Lost plan.
